These are instructions on how to capture your iPhone 3GS iBEC and iBSS which will be required to jailbreak in the near future.
**NOTE: It seems like most are able to capture both their iBEC and iBSS files in DFU mode. To try it just in DFU mode skip steps 4 through 6.
Step OnePress the Windows key + R to bring up the run dialog. In the entryfield type
%temp% then click
OK.

This will bring up the windows temp folder for your
user account. Make sure you order the folder by date modified with the most recent at the top. Scroll down to the top of the folder list.

You must be able to view hidden files and folders. In Vista you can do this by selecting
Organize from the toolbar then choosing
Folder and Search Options.

From the
View tab of the window that appears choose
Show hidden files and folders then click
OK Step Two
Create a new folder on your desktop called
Pwnage and place the 3.0 firmware in the folder. You can download the firmware from
here Step Three
Launch
iTunes from your
Programs menu.
 Step Four
Make sure your iPhone 3GS is connected to the computer then select from the list of devices on the left. Hold down the
Shift key and click the
Restore button

Select the iPhone2,1_3.0_7A341_Restore.ipsw file from the Pwnage folder on your desktop and click the
Open button.

Your iPhone will now begin restoring to the 3.0 firmware. You will be warned that this will erase your phone. Click the
Restore button to continue.
 Step Five
As the restore is progressing watch the %TEMP% folder we have open. A new folder will appear with a name similar to
Per518D.tmp. When the folder does appear, select it, then press
Control+c to copy it to the clipboard.

Move to the second Finder window that is showing the
Pwnage folder and press
Control+v to copy the file folder into the window.

**Remember you only have a limited time to do this as the folder will be removed very shortly. It seems like a new folder will pop into the %TEMP% directly three times during the DFU restore. You need to capture the first one that appears.
Step SixOnce the restore has completed iTunes will ask you to restore from backup or set up as a new phone. To keep your settings as before select
Restore from the backup of: then click the
Continue button
 Step Seven
Once the backup has been restored we will need to do another iPhone restore from DFU mode to get our iBSS. To do this follow
these instructions to put your iPhone into DFU mode.
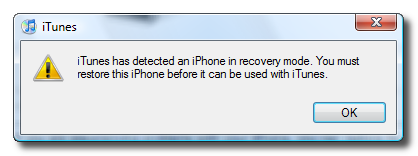
iTunes will popup a message saying it has detected an iPhone in recovery mode.
Click okay to this message then Hold down the
Shift key and click the
Restore button

Select the iPhone2,1_3.0_7A341_Restore.ipsw file from the Pwnage folder on your desktop and click the
Open button.

Your iPhone will now begin restoring to the 3.0 firmware. You will be warned that this will erase your phone. Click the
Restore button to continue.
Step EightAs the DFU mode restore is progressing watch the /tmp folder we have open in Finder. A new folder will appear with a name similar to
PerD112.tmp. When the folder does appear, select it, then press
Control+c to copy it to the clipboard.

Move to the second Finder window that is showing the
Pwnage folder and press
Control+v to copy the file folder into the window.

**Remember you only have a limited time to do this as the folder is removed shortly.
Step NineOnce the DFU restore has completed iTunes will ask you to restore from backup or set up as a new phone. To keep your settings as before select
Restore from the backup of: then click the
Continue button to finalize the restore.
Step TenThat's it. We now have captured our iBEC and iBSS. You can move these to a safe place to be used for a future jailbreak of your iPhone 3GS.
To confirm you have the files look in Pwnage/Per????.tmp/Firmware/dfu. You should see two files: iBEC.n88ap.RELEASE.dfu and iBSS.n88ap.RELEASE.dfu

 Download for Windows